
TL;DR
We ran a kitchen-scale molecular biology experiment and tried to add DNA to yeast so they would produce a green fluorescent protein. The experiment failed: the yeast we transformed never glowed convincingly. We still learned a lot about the workflow, the reagents, and the blind spots of at-home biotech kits.
I wrote this piece to encourage other curious people to try hands-on biology, to find like-minded experimenters, and to share what it was like to work with The Odin’s Bacterial CRISPR and Fluorescent Yeast Combo Kit. If you have questions, reach out through the contact details listed in my résumé on this site.
Background
A few years ago I set myself a “hello world” goal for molecular biology. I tried finding a lab in Moscow that would let an outsider run a small experiment: I emailed Skolkovo, the MIPT Genetic Engineering Center, anyone I could think of. No luck. At an ARHE meetup a lecturer even told me to stop wasting my time and enroll in a master’s program instead. Biology was (and still is) a hobby for me, so grad school didn’t make sense.
Then I discovered The Odin’s Bacterial CRISPR and Fluorescent Yeast Combo Kit. The pitch was irresistible: everything you need to perform real genetic engineering at home. I ordered it from the U.S. and started recruiting friends. Working alone sounded boring, so I teamed up with Yura Pekov. He pointed me to Andrey’s Facebook post about building a community lab called Mandragora Lab. Soon Valery Gusha joined us, and the three of us committed to running the experiment together.
Setting the Stage
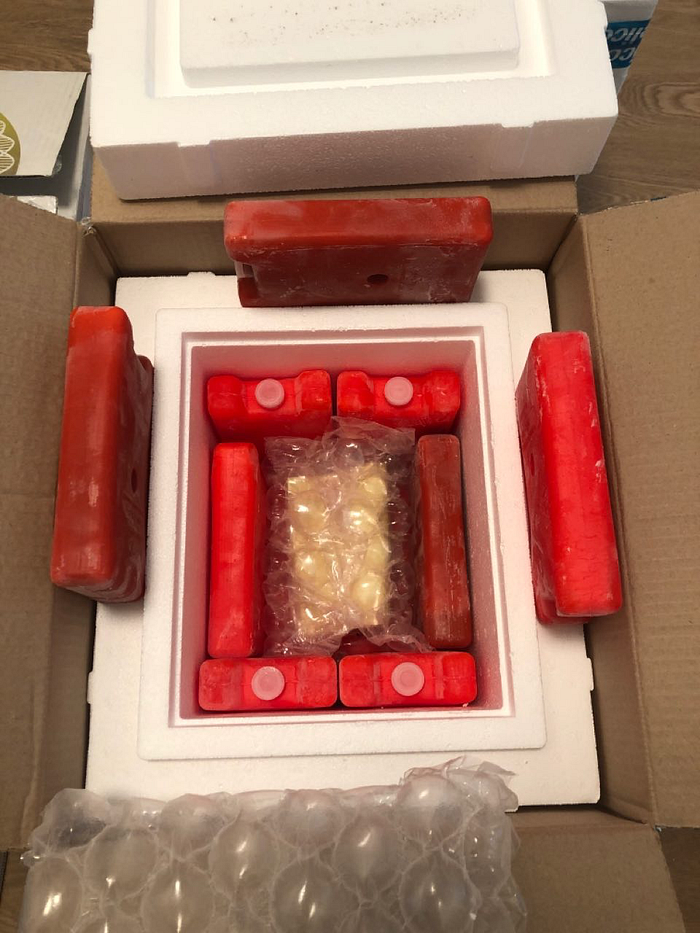
Months passed before the kit reached us. USPS refused to ship it to Russia because it contained liquids. The Odin refunded me, and I had to hunt for another carrier. DHL and other services declined—shipping “live organisms” is tricky. Eventually the Helicon company agreed to import it for ₽36,000 (about $500 at the time), which covered the kit plus door-to-door delivery. The package took three months to arrive, reportedly because of COVID-19 disruptions, but it came packed in massive insulated boxes with cold packs. The only missing item was the glass bottle for media preparation.
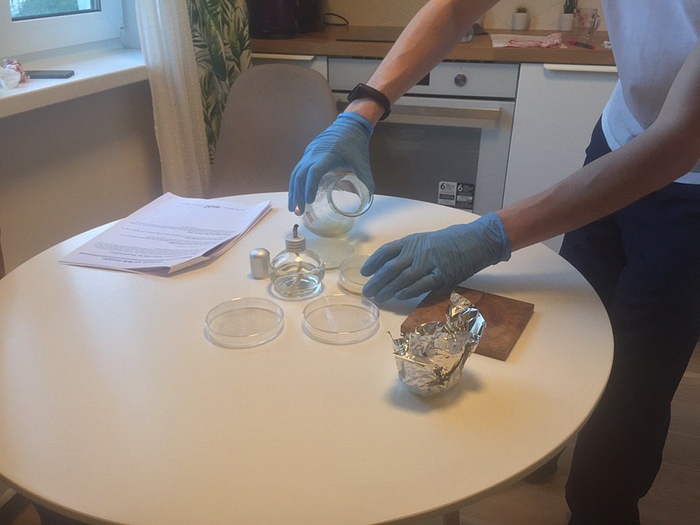
We decided to run the whole workflow in my apartment: Mandragora Lab doesn’t yet have a dedicated space, and we all lived in the same Moscow neighborhood anyway.
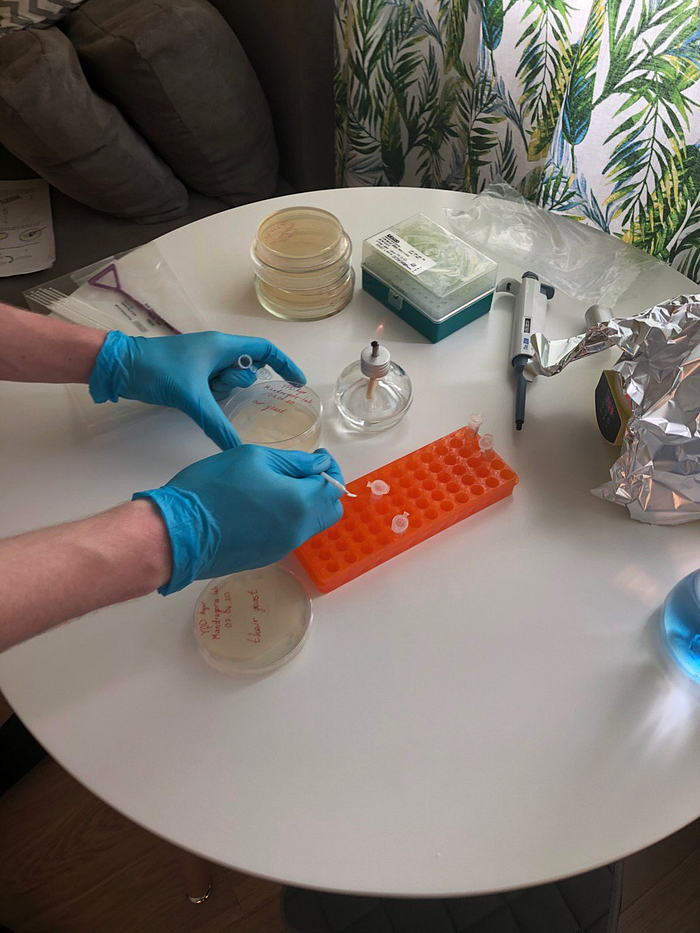
Day 1 — Pouring Plates
Our first task was to prepare YPD agar, a nutrient-rich medium for yeast. We mixed the dry components with water in a flask, heated it in a microwave until everything dissolved, and plated it in sterile Petri dishes while working right next to an alcohol burner to keep the air relatively clean.
To stay organized, we labeled every plate the moment it cooled down—professional science!
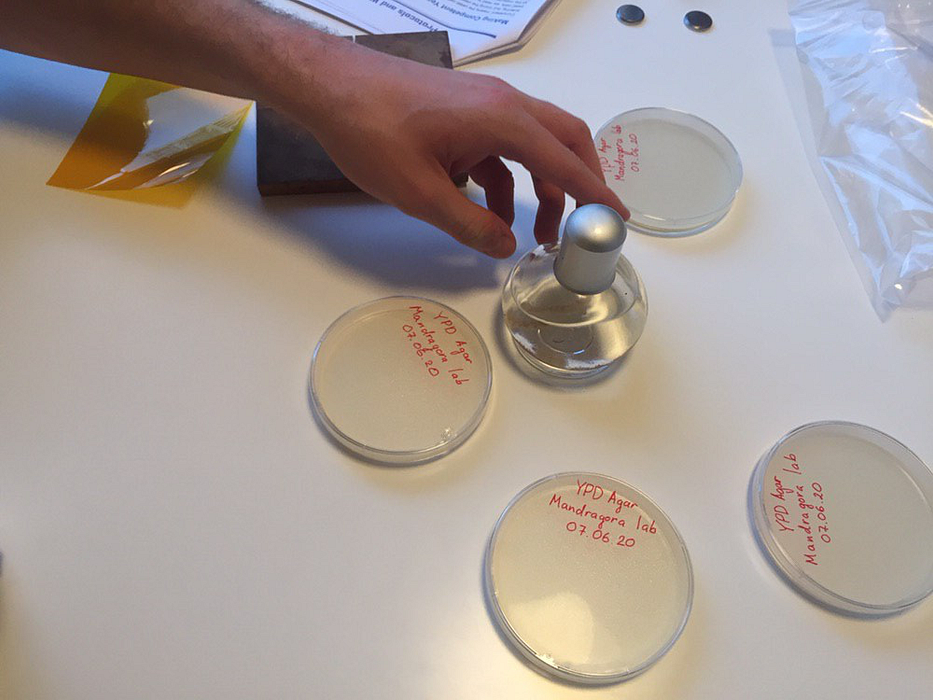
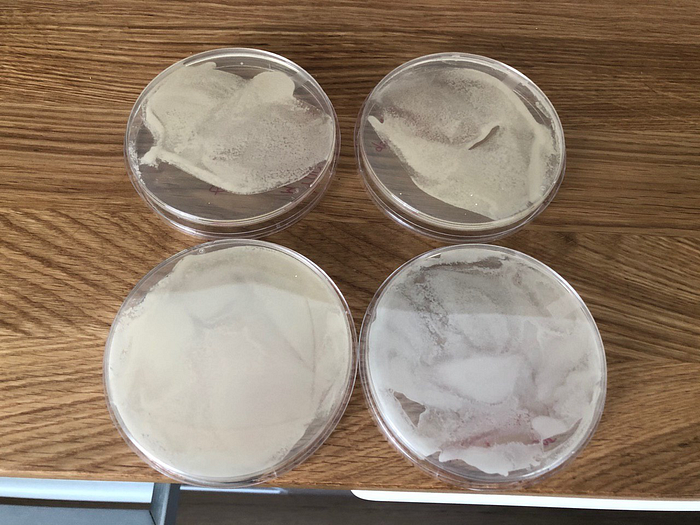
We wanted a control group, so we prepared two plates with grocery-store yeast and two plates with the yeast supplied in the kit. After the agar solidified, we resuspended the cells in water and used a spreader to inoculate the plates evenly.
For incubation we repurposed a budget egg incubator (about ₽2,000).
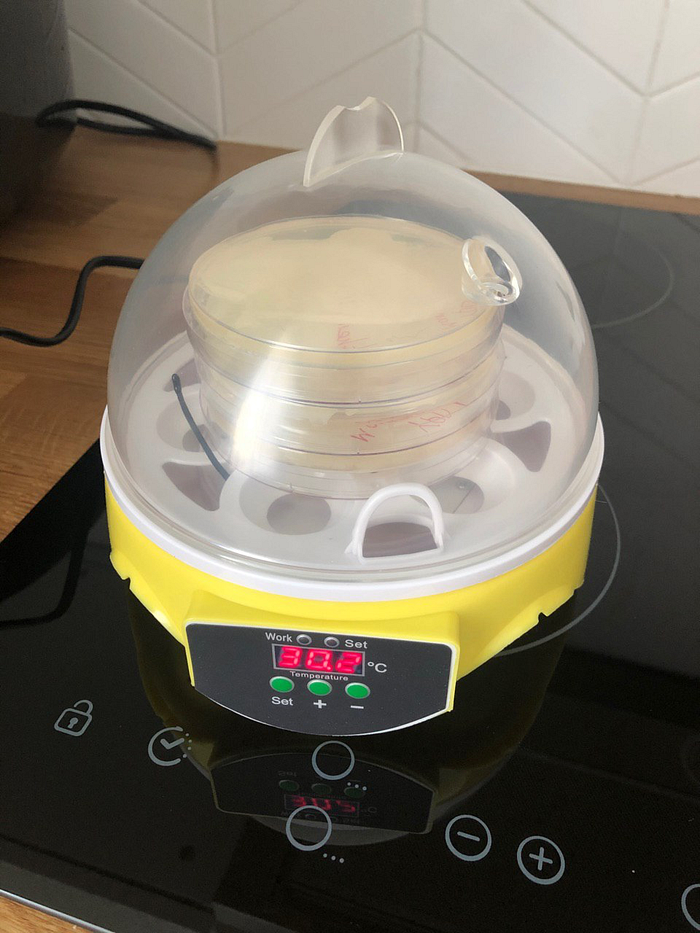
It did the job: by the next day every plate was covered in yeast colonies. The top row shows the kit yeast, the bottom row shows the store-bought yeast.
Day 2 — Making the Cells Competent
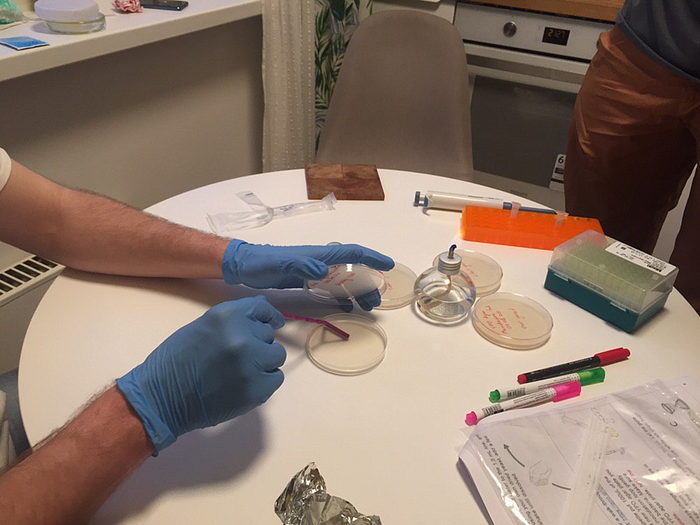
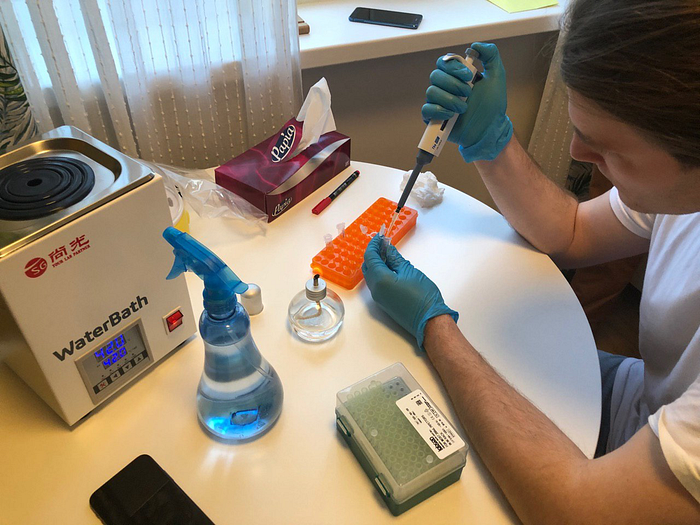
To get the GFP plasmid into yeast, the cells need to be “competent,” meaning receptive to foreign DNA. The Odin provides a transformation mix of 40% PEG 8000, 100 mM lithium acetate, and single-stranded carrier DNA. We prepped two sterile tubes with this mix, scraped yeast from the appropriate plates with inoculation loops, and combined everything. The tubes spent the night in the fridge at 4 °C so the cells could condition themselves.
We also had to prepare antibiotic plates using YPG agar plus G418. The plasmid carries both the GFP gene and an antibiotic resistance gene; that way only transformed cells should survive. We poured and labeled the plates just like on Day 1 and let them dry overnight.
Day 3 — Heat Shock
To actually introduce the plasmid, we retrieved the transformation tubes from the fridge and added the DNA.
The protocol calls for a 42 °C heat shock for one hour. A no-frills water bath from AliExpress handled the job. After the heat shock we moved each culture into fresh YPD liquid media so the yeast could recover at room temperature.
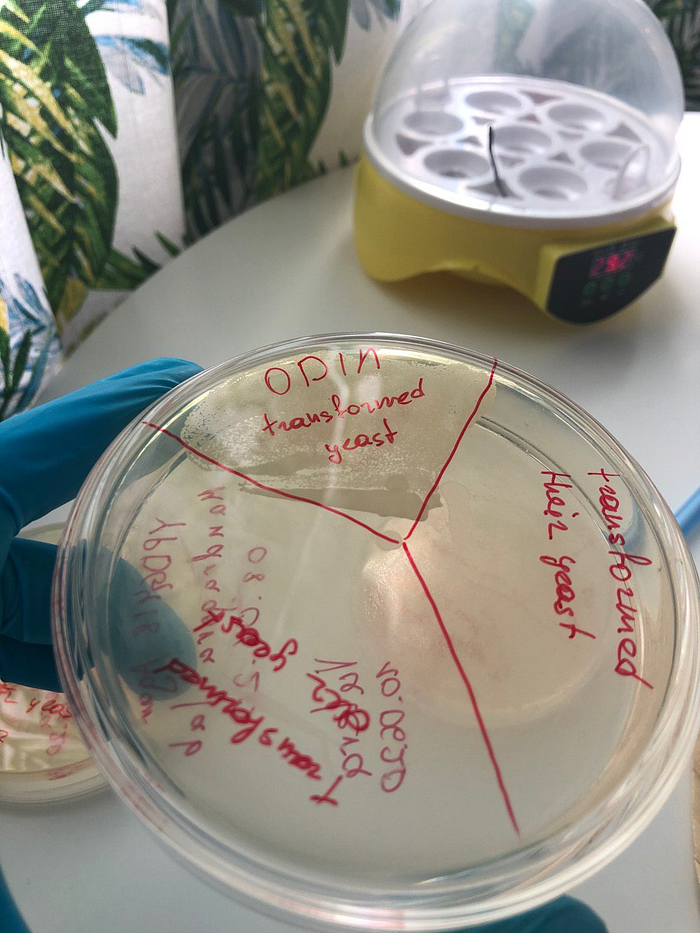
Day 4 — Plating on Antibiotic Media
Time to see whether any cells accepted the plasmid. We plated the recovered cultures onto the G418 plates. For controls we also streaked:
- ODIN-transformed yeast (already fluorescent when shipped),
- our transformed grocery yeast,
- transformed “their” yeast (the kit’s non-modified strain),
- untransformed grocery yeast,
- untransformed kit yeast,
- and a blank quadrant to check for contamination.
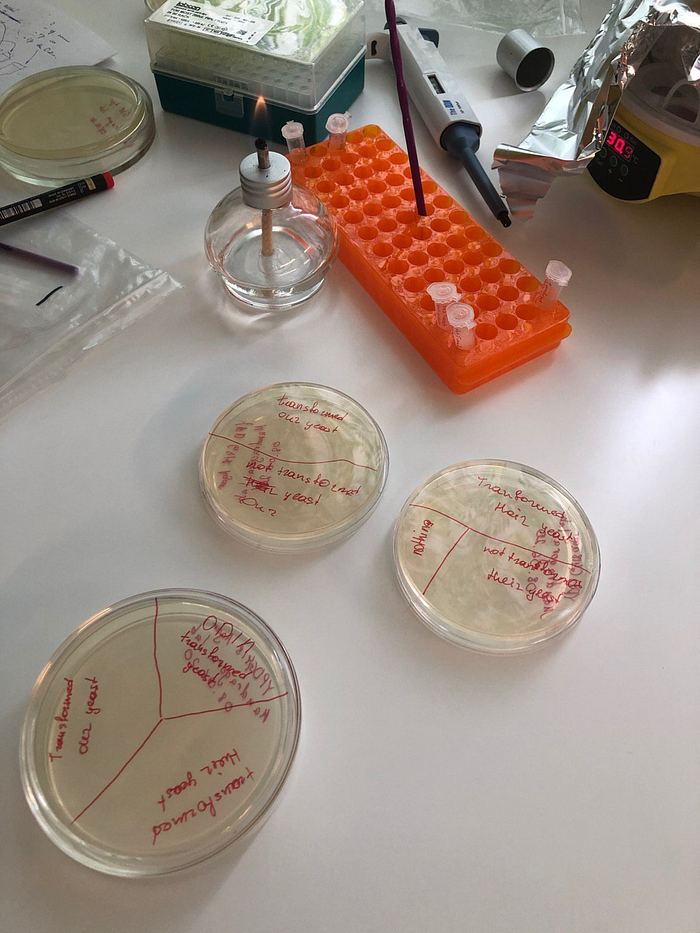
After streaking we incubated everything for a couple of days.
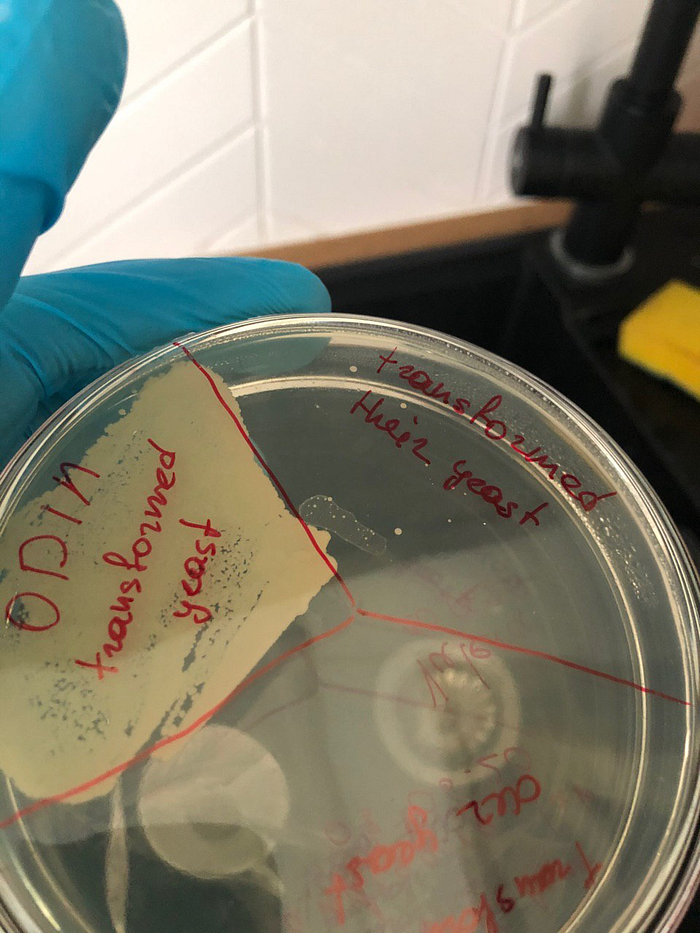
Day 5 — Mixed Results
When we checked the plates, only the pre-modified ODIN yeast had visible growth. Our grocery-store yeast and the kit yeast we transformed ourselves showed nothing, which was discouraging.
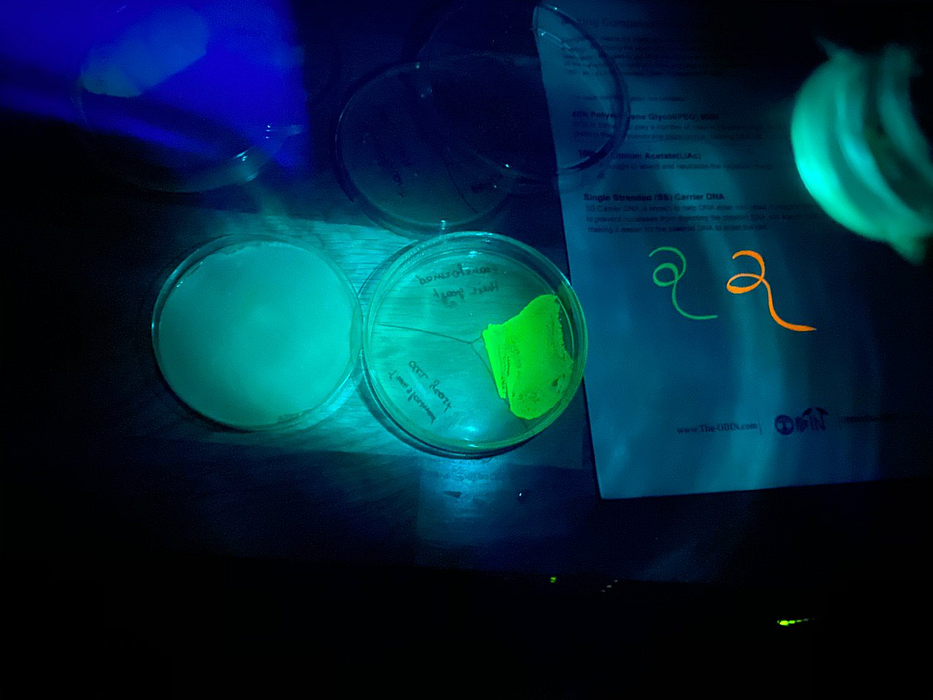
Day 6 — UV Reality Check
A day later small colonies finally appeared in the quadrant where we plated the kit yeast after our transformation attempt. The grocery-store strain still refused to grow.
Under UV light the pre-modified control yeast glowed a bright green, confirming the setup worked. The tiny colonies we produced, however, were barely visible and didn’t emit convincing fluorescence—they’re the faint dots on the left of the photo below.
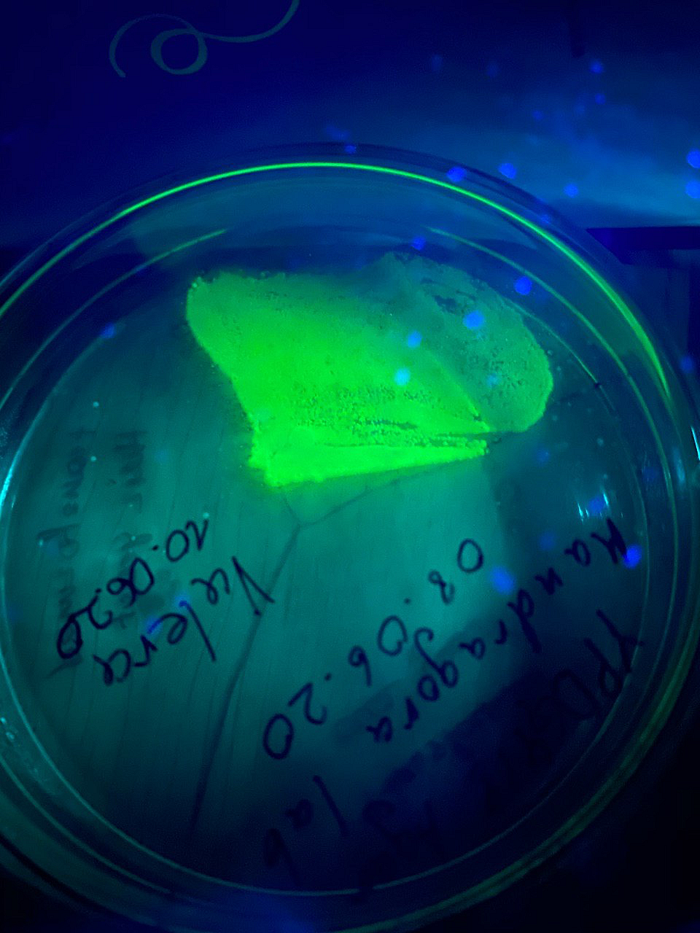
For comparison we placed an untransformed control plate next to the fluorescent colonies—no glow at all, as expected.
At that point we had to stop; scheduling prevented us from continuing the incubation, so the experiment ended.
What We Took Away
- Working in a makeshift home setup, we consistently grew yeast on plates without contamination. That part of the pipeline is repeatable.
- We never saw strong growth from the transformed cultures, which meant we couldn’t definitively claim success.
- Possible root causes we considered:
- We could have made a critical protocol mistake, although we ran multiple transformations in parallel and followed the instructions carefully.
- Maybe only a tiny fraction of cells picked up the plasmid, which would explain the slow-growing colonies. If that’s true, why did the grocery-store strain fail entirely?
- The plasmid might have degraded during the three-month international shipment.
- The Odin might have packed a faulty kit—others have reported similar problems where the plasmid tube allegedly contained just water.
What’s Next
We still have enough consumables for another attempt, but before repeating this exact workflow we plan to run The Odin’s CRISPR/Cas experiment. Broader experience should help us revisit the fluorescent yeast kit with sharper instincts and better troubleshooting strategies.